Since we completed the required environment set up in the previous article, I would like to implement the Mapbox map view with SwiftUI. If you didn’t complete the environment setup yet, please refer to the previous article to proceed with the contents of this article. You may think that the most simple quick start has been provided officially and it will help to create a view just by copy and paste. But unfortunately, it’s not true. Actually, the official site provides the simple sample code to create a map view, however, that code is not compatible with SwiftUI as it is. Therefore, first of all, I will introduce the UIViewRepresentable and UIViewControllerRepresentable that enables you to implement this problem. Then also introduce how to implement a simple Mapbox Map View into your SwiftUI project.
Xcode: 13.2.1
iOS: 15.2
Swift: 5
Maps SDK for iOS: v10.2.0
The problem with the Maps SDK for iOS sample code
Unfortunately, there is no official sample code with SwiftUI so far. There is only the sample code with UIViewController. UIViewController is not compatible with SwiftUI directly, however, it would be implemented with SwiftUI by using UIViewRepresentable.
About UIViewRepresentable
According to the Apple Developer site, UIViewRepresentable is introduced as below.
A wrapper for a UIKit view that you use to integrate that view into your SwiftUI view hierarchy.
https://developer.apple.com/documentation/swiftui/uiviewrepresentable
That means the UIViewRepresentable is worked as some kind of shock absorber between “legacy” UIKit and “New” SwiftUI. UIViewController is included in the UIKit as below, we can implement UIViewController with SwiftUI by utilizing this UIViewRepresentable.

The essential sample of UIViewRepresentable
We understood that we can implement UIViewController in SwiftUI by utilizing the UIViewRepresentable but how? Unfortunately, the Apple Developer site only provides the sample of how to “call” UIViewRepresentable not “implement” UIViewRepresentable. So we need to read the Apple Developer site carefully and have to find out the solutions.
You can find the three actions below in the Topics area in the Apple Developer site of UIViewRepresentable.
- Creating and Updating the View
- Cleaning Up the View
- Providing a Custom Coordinator Object
Only we should know at this time is “1. Creating and Updating the View” to create a simple view in SwiftUI. So let’s deep into this topic.
About UIViewRepresentable: Creating and Updating the View
Some elements have been introduced in ”Creating and Updating the View”, and the following is defined as Required. This implies that we can utilize UIViewRepresentable just by creating a struct with these three elements.
| func | makeUIView | Create the View |
| func | updateUIView | Update the View |
| associatedtype | UIViewType:UIView | The type of the View to wrap |
Implement the map view of Mapbox with SwiftUI
Now we see the required knowledge to implement the map view of Mapbox with SwiftUI. So let’s start to implement using actual sample code. I will create a map view and call it from ContentView in this article.
Import SwiftUI and MapboxMaps
Create a new file named MapView.swift that will implement the Mapbox’s map view. First of all, import the required libraries to implement this MapView.swift. In the Mapbox official document, it is introduced the sample that imports, not SwiftUI but UIKit. But, we need to import SwiftUI instead of UIKit in this case.
import SwiftUI
import MapboxMaps
Implement ViewController
Next, implement the ViewController that is the main part of the map view. This part can reuse the sample code introduced in the official document of Maps SDK for iOS directly.
class ViewController: UIViewController {
   internal var mapView: MapView!
   override public func viewDidLoad() {
       super.viewDidLoad()
       let myResourceOptions = ResourceOptions(accessToken: "your_public_access_token")
       let myMapInitOptions = MapInitOptions(resourceOptions: myResourceOptions)
       mapView = MapView(frame: view.bounds, mapInitOptions: myMapInitOptions)
       mapView.autoresizingMask = [.flexibleWidth, .flexibleHeight]
       self.view.addSubview(mapView)
   }
}
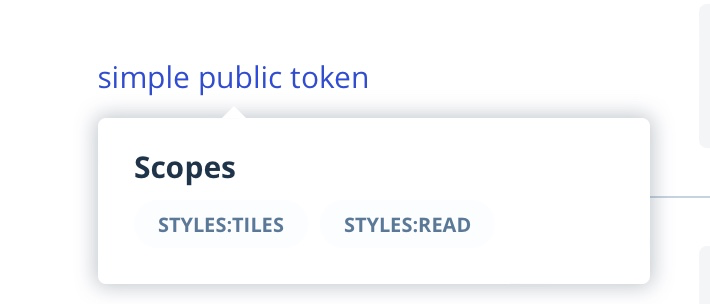
Note that you have to fill “your_public_access_token” in the accessToken parameter with your Public Token that can be found in your Mapbox account page. You can use the Default public token here, but I will use the Custom Token created in the previous article which includes two public scopes.
Enable to call ViewController with SwiftUI by using UIViewControllerRepresentable
As mentioned above, we cannot call this UIViewController as it is. So we need to wrap this UIViewController within UIViewControllerRepresentable. I will implement it like below to make it as simple as possible.
| func | makeUIView | Just return the ViewController which is the type of UIViewController |
| func | updateUIView | Nothing to do |
| associatedtype | UIViewType | Specify the ViewController which I created |
As a result, the UIViewControllerRepresentable to implement is as below.
struct MapViewWrapper : UIViewControllerRepresentable {

   func makeUIViewController(context: Context) -> ViewController {
       return ViewController()
   }

   func updateUIViewController(_ uiViewController: ViewController, context: Context) {

   }
}
Implement the call part of ContentView
At last, I will implement the call ViewController from ContentView. Actually, it can be implemented as simply call the MapViewWrapper which I created just like a view of SwiftUI.
//  ContentView.swift

import SwiftUI

struct ContentView: View {
    var body: some View {
        MapViewWrapper()
    }
}
Build and Execute
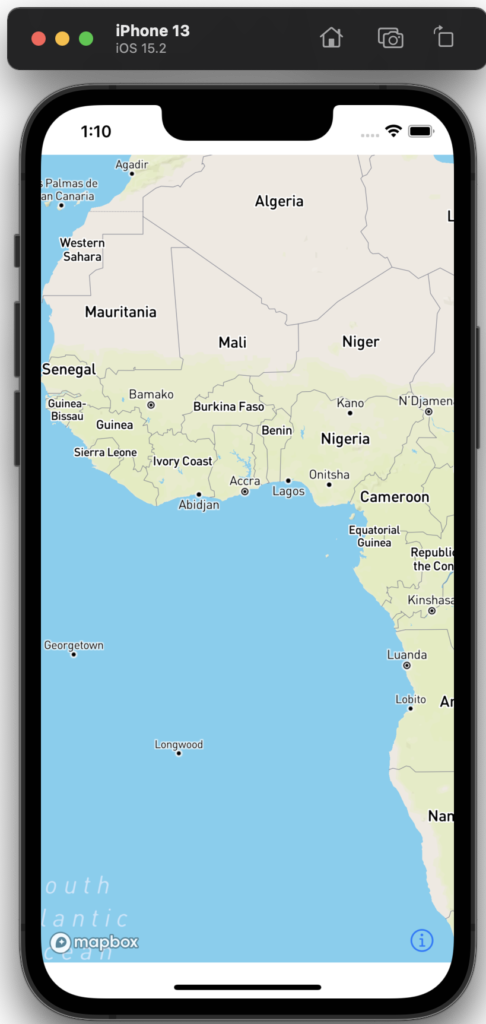
Now since all the implementation has been completed, let’s try to build and execute the code. Once the build and execution have been completed the app simulator shows the map like below. This map is generated as the point of center with both longitude and latitude is zero. By the way, this center point is called Null Island.
Note that once you show the map, you can confirm the account usage as below on your Mapbox account page. “25,000” is allocated as a free tier, and it seems good enough to use individually. However, it might be dramatically increased if you leak your tokens. So please take care and carefully manage your tokens for your “peace of mind”.
Wrapup
- Since the sample code of the map view of Mapbox is provided as a UIViewController, we cannot implement SwiftUI as it is.
- UIViewControllerRepresentable can integrate SwiftUI and UIKit that includes UIViewController.
- Map view shows Null Island without parameters.
Related Articles
References

Sample code created in this article
ContentView.swift
//  ContentView.swift
import SwiftUI
struct ContentView: View {
    var body: some View {
        MapViewWrapper()
    }
}
struct ContentView_Previews: PreviewProvider {
    static var previews: some View {
        ContentView()
    }
}
MapView.swift
//  MapView.swift
import SwiftUI
import MapboxMaps
struct MapViewWrapper : UIViewControllerRepresentable {

    func makeUIViewController(context: Context) -> ViewController {
        return ViewController()
    }

    func updateUIViewController(_ uiViewController: ViewController, context: Context) {

    }
}
class ViewController: UIViewController {

    internal var mapView: MapView!
    override public func viewDidLoad() {
        super.viewDidLoad()
        let myResourceOptions = ResourceOptions(accessToken: "pk.eyJ1IjoiaGFydWJlYXJzIiwiYSI6ImNrdzFuNDh6NzAydGoybm1wZGdudm5ybTkifQ.mnv9PQFHVGZzxxxxxxxxxx")
        let myMapInitOptions = MapInitOptions(resourceOptions: myResourceOptions)
        mapView = MapView(frame: view.bounds, mapInitOptions: myMapInitOptions)
        mapView.autoresizingMask = [.flexibleWidth, .flexibleHeight]
        self.view.addSubview(mapView)
    }
}