In this article, I would like to introduce how to prepare the WordPress environment on the PC utilizing the Docker Desktop. Some of you might face some issues when you changed some configurations or installed some plugins. Anyway, it’s a better method to keep your WordPress clean so that you can check the visibility or feasibility of this kind of local environment in advance.
I would like to explain the following in this article.
- Install the WordPress on the Docker Desktop
- Migrate the production WordPress to the Local WordPress
mac OS: 12.2.1 (m1 macbook pro)
Docker Desktop: 4.7.1
Install the WordPress on the Docker Desktop
First, I would like to install WordPress on the Docker Desktop based on this document. Beforehand, I should say that I had to do some additional configurations above this document. Let me explain later in this article.
Create a working directory
First of all, you need to create a working directory that will be the name of your Docker container. I created the directory with the name my_wordpress in this article. So from now, every command has to be executed in this directory.
Create docker-compose.yml
Suppose, the most of you can install the WordPress on the Docker Desktop by just creating this docker-compose.yml, and execute a single command.
version: "3.9"

services:
  db:
    image: mysql:5.7
    volumes:
      - db_data:/var/lib/mysql
    restart: always
    environment:
      MYSQL_ROOT_PASSWORD: somewordpress
      MYSQL_DATABASE: wordpress
      MYSQL_USER: wordpress
      MYSQL_PASSWORD: wordpress

  wordpress:
    depends_on:
      - db
    image: wordpress:latest
    volumes:
      - wordpress_data:/var/www/html
    ports:
      - "8000:80"
    restart: always
    environment:
      WORDPRESS_DB_HOST: db
      WORDPRESS_DB_USER: wordpress
      WORDPRESS_DB_PASSWORD: wordpress
      WORDPRESS_DB_NAME: wordpress
volumes:
  db_data: {}
  wordpress_data: {}
Run with docker-compose up -d
Once you create the, you can run the WordPress with the following command.
docker-compose up -d
This command allows the Docker Desktop to run the service, WordPress in this case, according to the docker-compose.yml as a background service.
Once this command is executed, you can find the Docker container is the running status on the Docker container with the created directory name.
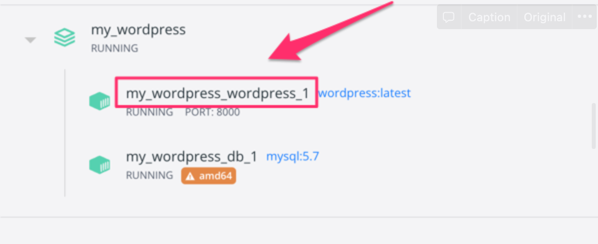
Also, If you can see the WordPress installation screen by accessing localhost:8000, it’s done. Congratulations!
In case of using M1 mac
But, if you are using an M1 mac architecture PC, such as an M1 MacBook pro, you might find the following error message when you execute docker compose up -d command.
% docker-compose up -d
Creating network "my_wordpress_default" with the default driver
Creating volume "my_wordpress_db_data" with default driver
Creating volume "my_wordpress_wordpress_data" with default driver
Pulling db (mysql:5.7)...
5.7: Pulling from library/mysql
ERROR: no matching manifest for linux/arm64/v8 in the manifest list entries
In this case, we need to add a single line, that specifies the platform architecture, to docker-compose.yml as the below.
version: "3.9"

services:
  db:
    platform: linux/x86_64
    image: mysql:5.7
    volumes:
      - db_data:/var/lib/mysql
    restart: always
    environment:
      MYSQL_ROOT_PASSWORD: somewordpress
      MYSQL_DATABASE: wordpress
      MYSQL_USER: wordpress
      MYSQL_PASSWORD: wordpress

  wordpress:
    depends_on:
      - db
    image: wordpress:latest
    volumes:
      - wordpress_data:/var/www/html
    ports:
      - "8000:80"
    restart: always
    environment:
      WORDPRESS_DB_HOST: db
      WORDPRESS_DB_USER: wordpress
      WORDPRESS_DB_PASSWORD: wordpress
      WORDPRESS_DB_NAME: wordpress
volumes:
  db_data: {}
  wordpress_data: {}
I believe that you can run the WordPress with the docker-compose run up -d command.
Next, I would like to introduce the migration steps from the production WordPress, which has been ever used, to the local WordPress, which has been created just now.
Migrate from the existing WordPress site to the Local WordPress site
First of all, I have to say that the perfect migration is not an easy task. I found there are a couple of migration tools or plugins that might reduce our workload.
However, I would like to go with the most simple way that is introduced in some hosting service sites, like this document. i.e.) “Export and Import”.
Note that some items, such as plugins or themes, are not included in the migration procedure of this article. Those excluded items are required to be installed manually if you need them.
Export from the existing site
The export steps have to be done on the existing site, maybe it’s your production site.
Navigate to “[Tools] - [Export]" , select “[All content]“, and click “[Download Export File]" will download the XML file on your PC.
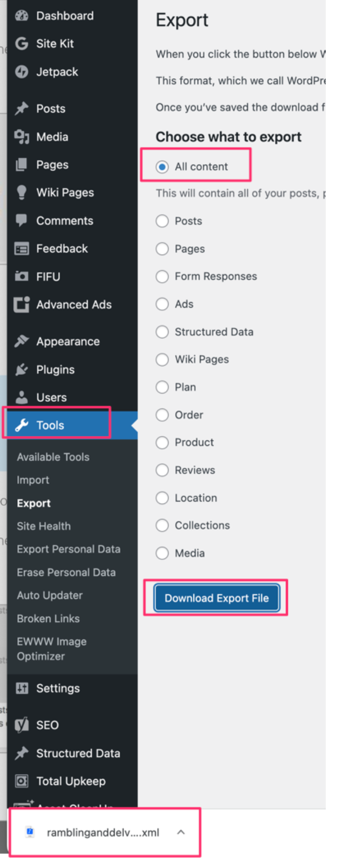
That’s all for the Export.
Import to the local WordPress
The import steps will go with the WordPress on the Docker Desktop that has been created in the previous chapter.
Install WordPress Importer plugin
To import the data into the created WordPress, the WordPress has a preset import plugin named WordPress Importer. I think there are many tremendous plugins above this plugin because this plugin is no longer tested. However, I will go with this plugin just because it’s a “default listed plugin”.
We need to install this plugin by navigating to [Tools] - [Import] - [WordPress], then click [Install Now].
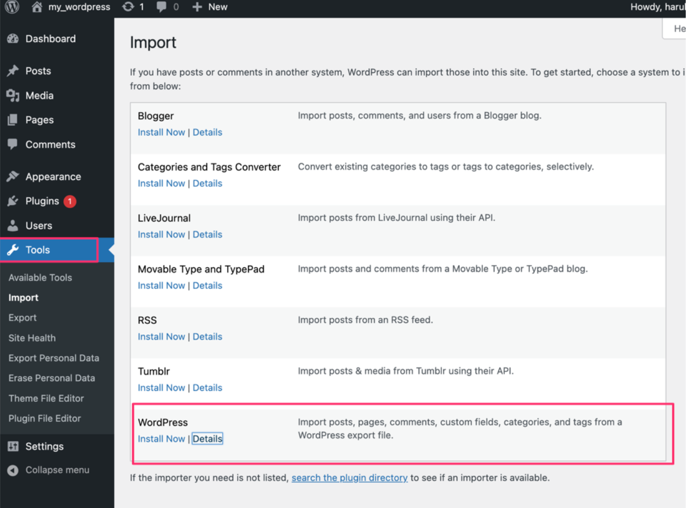
The installation is completed, you can find the [Run Importer] button.

Import Configuration
Once you click the [Run Importer] button, the following screen will appear. So you should upload the XML file downloaded previously.
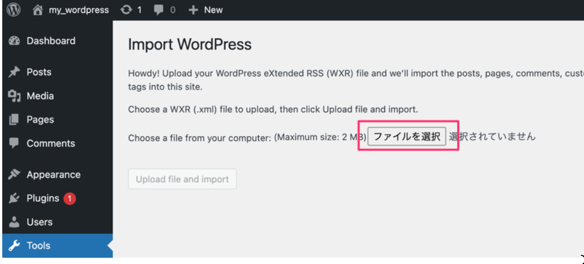
If the XML file upload is completed, you can click the [Upload file and import] button, so click it.

Next, import asks for the user assignment. Since I would like to keep the users, I keep the assigned section as it was.
Also, this screen asks if an attachment file, such as an image or movie, will import or not. I would like to check that the media files are downloaded from the existing site.
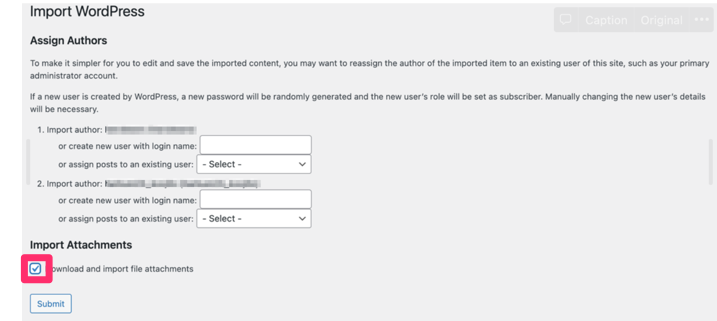
The import tasks will start by clicking the [Submit] button. It takes several minutes depending on the exported site size. So you should consider the timing or network speed when performing the import.
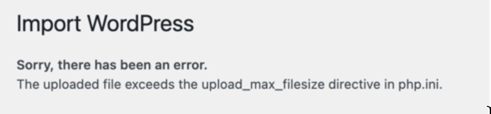
In the case of the existing site that size is a slightly large
You might face the following error when you are going to upload the downloaded XML file. This is because the default upload file size is set as 2MB. So if you have to upload the XML file exceeding 2MB, you have to do some additional configuration.
Modify php.ini to increase the upload_max_filesize
Actually, there are a couple of methods to increase the upload file size. If you would like to see the several methods, you can find them here for example.
Whatever I would like to introduce the following steps that will create a php.ini file from the preset sample php.ini.
- Download the preset
php.ininamedphp.ini-development - Rename the downloaded file to
php.ini - Add
upload_max_filesizeconfiguration in thephp.ini - Add
volumesentry in thedocker-compose.yml - Restart the WordPress container with
docker-compose up -dcommand
Let me explain the detail a little next.
Prerequisites of these steps
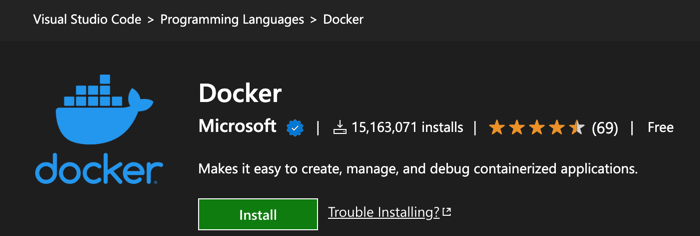
I assume that a large number of you use the Visual Studio Code to follow the previous steps I introduced. So I will go along with the Visual Studio Code in this article. Also, I use The Docker extension as well. If you don’t install it, I highly recommend installing this extension to interact with the Docker Desktop.
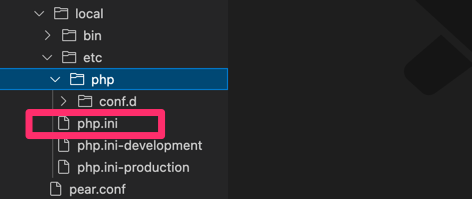
Download the preset php.in
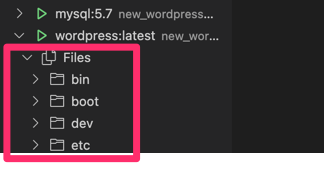
At first, connect to the WordPress container from the Docker extension of the Visual Studio Code as below. You can find the files in the container listed.
In the Files tree, navigate to the path of /usr/local/etc/php. Then you will find the file php.ini-development.
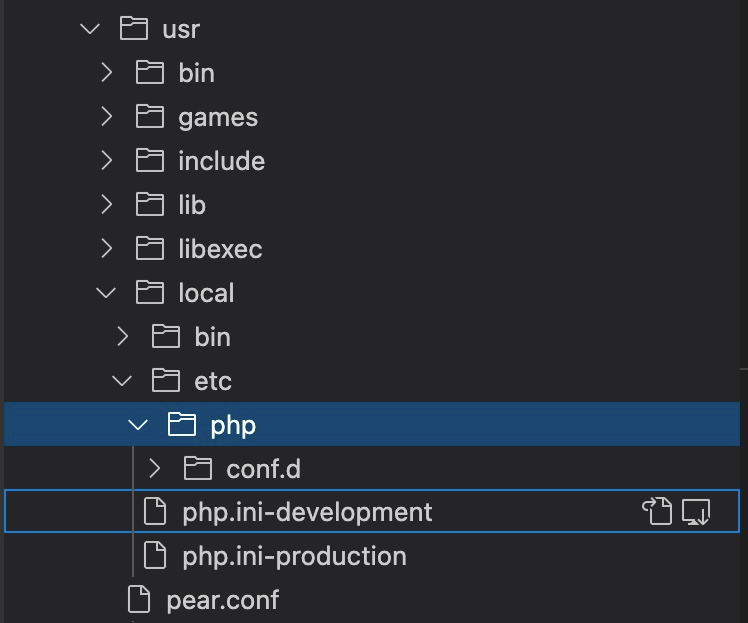
Right click, then select [Download] to download this file. Make sure this php.ini-development has been downloaded in your working directory that was created first.

Rename and Edit php.ini
Rename the downloaded php.ini-development to php.ini. Then open this php.ini. You will find a lot of configurations in this file. It is better for you to check this configuration just in case. But I would like to keep the original configurations in this article.
Then find the following block in the php.ini. This is the configuration that restricted the upload file size up to 2 MB.
; Maximum allowed size for uploaded files.
; http://php.net/upload-max-filesize
upload_max_filesize = 2M
So I would like to edit this restriction up to 16 MB. Of course, you should set this value as you want.
; Maximum allowed size for uploaded files.
; http://php.net/upload-max-filesize
upload_max_filesize = 16M
Edit docker-compose.yml
Next, you need to upload this file to the WordPress container. To do that, you have to add a single configuration in the docker-compose.yml. Open the docker-compose.yml and find the wordpress: section.
In the volumes: section, add the following line that will copy php.ini in the current working directory to the target path in the WordPress container.
  wordpress:
    depends_on:
      - db
    image: wordpress:latest
    volumes:
      - wordpress_data:/var/www/html
      - ./php.ini:/usr/local/etc/php/php.ini
    ports:
      - "8000:80"
    restart: always
    environment:
      WORDPRESS_DB_HOST: db
      WORDPRESS_DB_USER: wordpress
      WORDPRESS_DB_PASSWORD: wordpress
      WORDPRESS_DB_NAME: wordpress
Restart the WordPress container
At last, you have to restart the WordPress container to enable the configuration in the php.ini. Run the following command will enable the configurations.
docker-compose down && docker-compose up -d
Check the configuration
Once the docker-compose command has been completed, you can find the php.ini is uploaded and listed in the WordPress container.
php.iniAlso, navigate to the [Media] - [Add New].
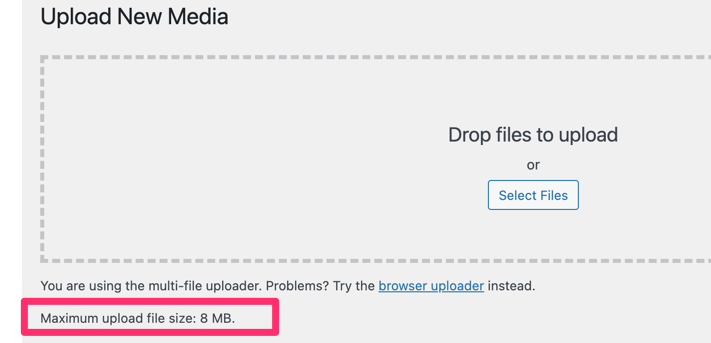
You will find the maximum upload file size has shown as 8 MB which is used to be shown as 2 MB. But why 8 MB instead of 16 MB?
WordPress has another configuration regarding the file upload things, post_max_size.
; Maximum size of POST data that PHP will accept.
; Its value may be 0 to disable the limit. It is ignored if POST data reading
; is disabled through enable_post_data_reading.
; http://php.net/post-max-size
post_max_size = 8M
In this screen, the minimum value within upload_max_filesize and post_max_size is effective. So if the upload_max_filesize is 2 MB, this screen takes the 2 MB that is larger than the post_max_size, 8 MB.
So you can import up to 16 MB at this moment.
Summary
- Need a working directory that will be the container name
- Create the
docker-compose.ymlaccording to the document.- Specify the platform if you are using an M1 mac architecture
- Execute the docker-compose up -d to run the WordPress container
- Migration by using export and import
- WordPress importer plugin is required. But there are many good alternatives.
- Utilize the
php.iniif you are going to upload more than 2 MB size.