Xcode 12.4, Swift 5
SwiftUIで利用可能なGroupBoxについて簡単なサンプルを使って実際の動きをみていきます。公式ドキュメントでは「コンテンツの論理的なグループに関連付けられたオプションのラベルを持つスタイル化されたビュー」とのことですが、実際の例を使ってみてみるのが理解が早そうです。
最小構成
[ads]
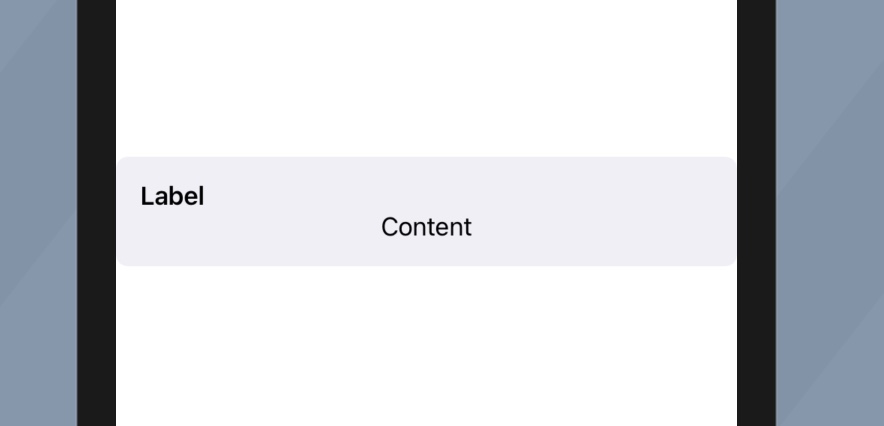
まずは一番シンプルな形で配置してみます。灰色で囲まれたエリアの左上にlabelとして指定したTextオブジェクトが配置されていて、中央にGroupBoxのコンテンツであるTextオブジェクトが配置されています。
import SwiftUI

struct ContentView: View {
    var body: some View {
        GroupBox(label: Text("Label")) {
            Text("Content")
        }
    }
}
コンテンツにListを使用
[ads]
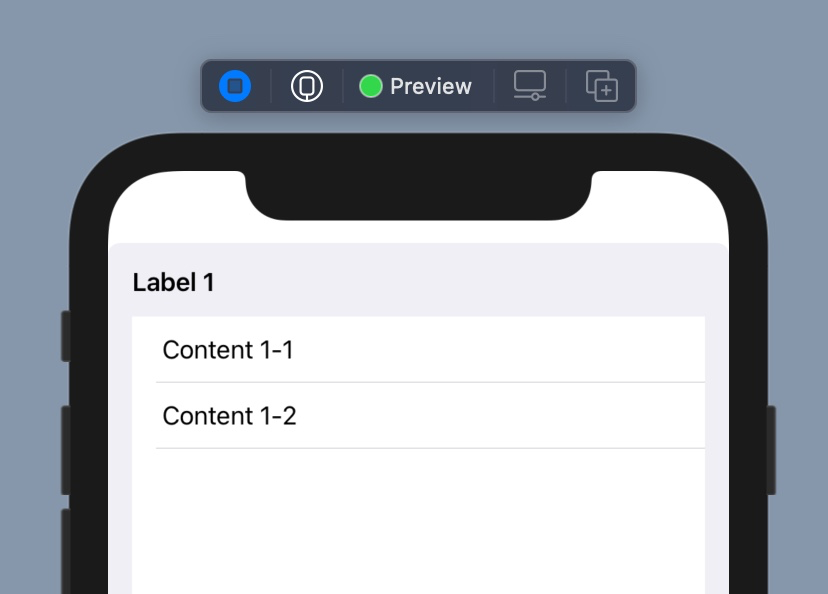
コンテンツにListを用いてみます。List全体に対してlabelが1つ配置されています。
struct ContentView: View {
    var body: some View {
        HStack {
            GroupBox(label: Text("Label 1")) {
                List {
                    Text("Content 1-1")
                    Text("Content 1-2")
                }
            }
        }
    }
}
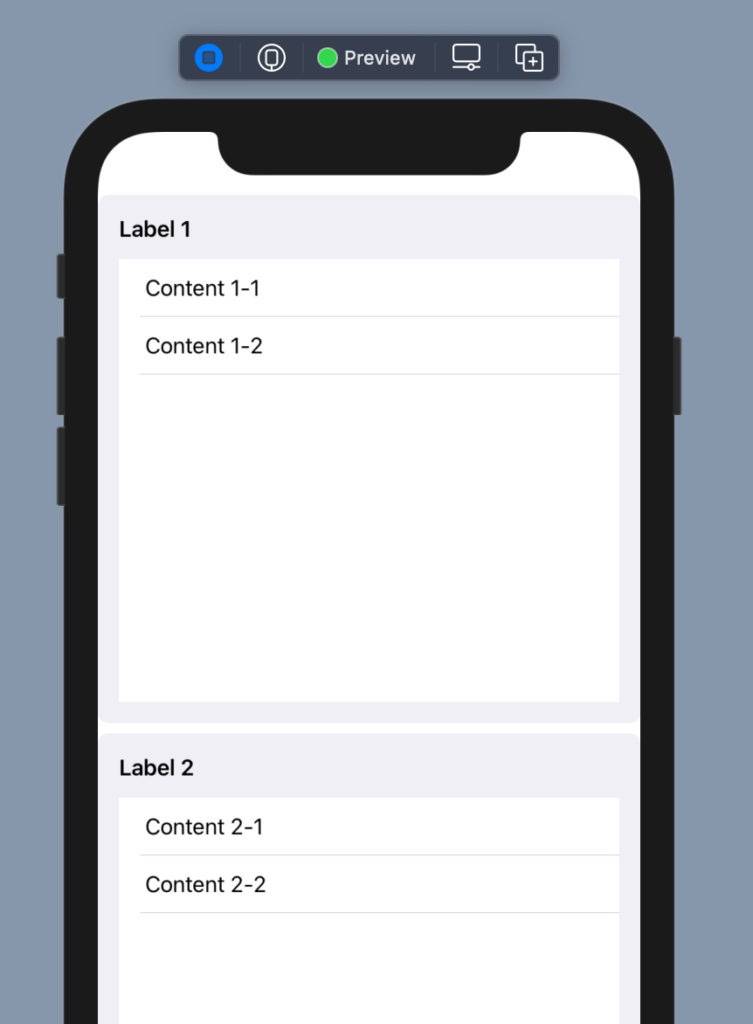
GroupBoxを複数配置
[ads]
GroupBoxをVStackを使って2つ配置してみます。GroupBox毎に設定した「ラベル+コンテンツ」のセットで配置されています。
struct ContentView: View {
    var body: some View {
        VStack {
            GroupBox(label: Text("Label 1")) {
                List {
                    Text("Content 1-1")
                    Text("Content 1-2")
                }
            }
            GroupBox(label: Text("Label 2")) {
                List {
                    Text("Content 2-1")
                    Text("Content 2-2")
                }
            }
        }
    }
}
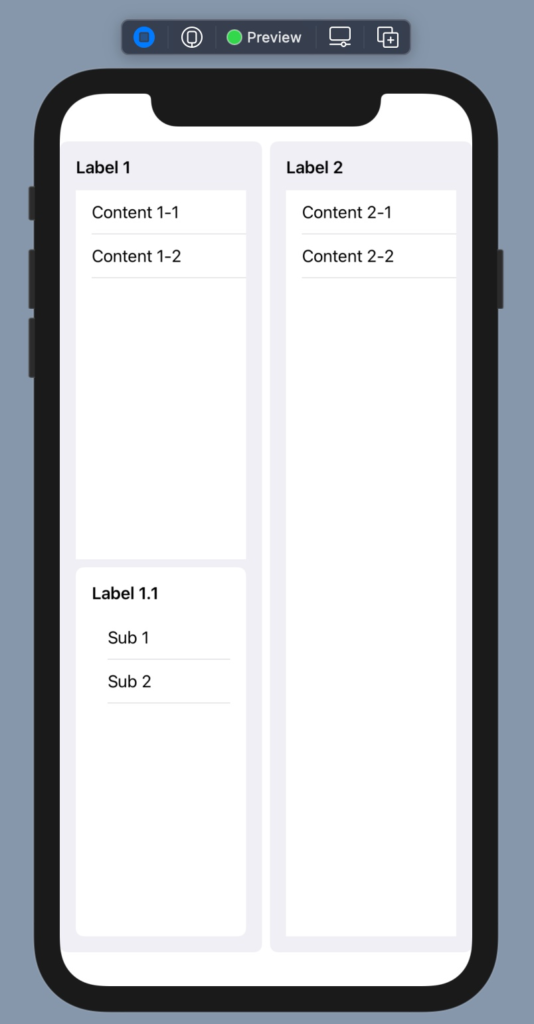
GroupBoxをネスト
[ads]
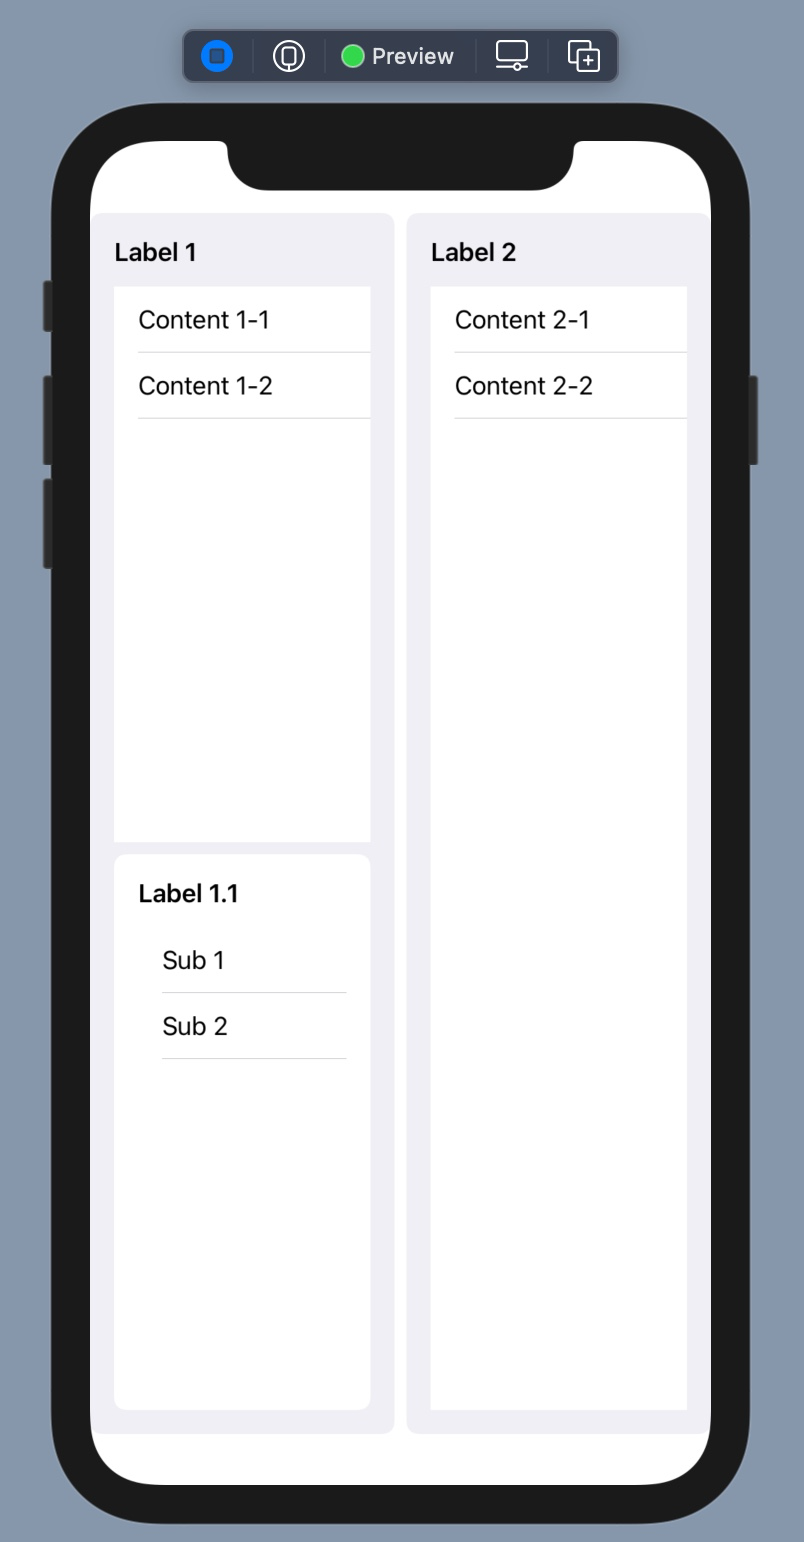
最後にGroupBoxをネストしてみます。HStackで左右に配置した2つのGroupBoxの内、左側についてVStackの2つ目をネストしています。ネストしたGroupBoxにもコンテンツであるListに対して「Label 1.1」という固有のラベルが設定されました。
import SwiftUI

struct ContentView: View {
    var body: some View {
        HStack {
            GroupBox(label: Text("Label 1")) {
                List {
                    Text("Content 1-1")
                    Text("Content 1-2")
                }
                GroupBox(label: Text("Label 1.1")) {
                    List {
                        Text("Sub 1")
                        Text("Sub 2")
                    }
                }
            }
            GroupBox(label: Text("Label 2")) {
                List {
                    Text("Content 2-1")
                    Text("Content 2-2")
                }
            }
        }
    }
}
まとめ
[ads]
今回はListオブジェクトをGroupしてみましたが、他のオブジェクトでも可能そうですので、グルーピングしたいコンテンツがある場合はDisclosureGroupなどと組み合わせると限られたスペースを有効活用できそうです。
References

GroupBox | Apple Developer Documentation
A stylized view, with an optional label, that visually collects a logical grouping of content.
developer.apple.com

https://itnext.io/swiftui-groupbox-for-ios-bb16aa71469c
itnext.io