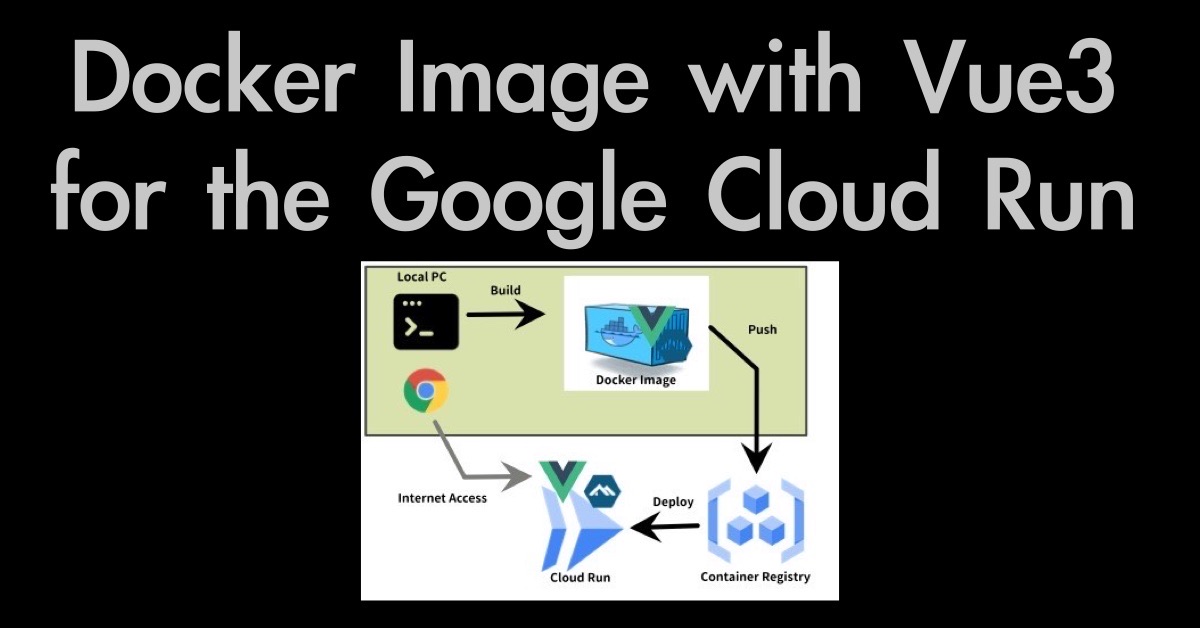
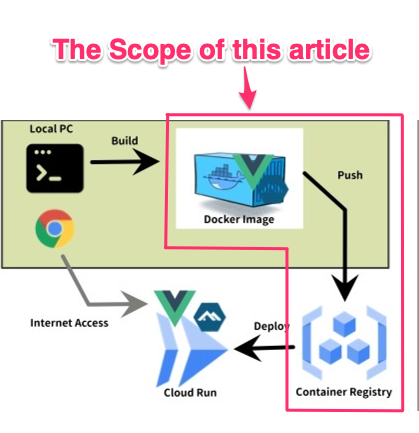
This article is a part of the series, “Publish the Vue3 Docker Image to Google Cloud Run“. I would like to introduce the steps from the preparation of the docker push command so that we can push the Docker image to the Google Container Register (GCR) we can deploy the container to the Google Cloud Run from there. Please see the overall deployment flow below.
Since I am going to use the Docker image that has been built in advance, if you would like to know how to build the Docker image, this previous article might be helpful.
mac OS: 12.3.1 (m1 mac book pro)
Docker Desktop: 4.7.1
Prerequisites
Before we dive into the procedure, we should look at the prerequisites. There are two primary requisites regarding this topic.
GCP account
First, of course, we need to have an account on the Google Cloud Platform (GCP). Besides, the accounts should be enabled as billable.
The details are mentioned here. And, the steps on how to verify if the account is billable or not are available here.
Google Cloud SDK (gcloud)
Since I would like to utilize the gcloud commands in this article, so we need to install the Google Cloud SDK (gcloud) before we begin to proceed.
The details are available here.
The steps to push the Docker image overview
Once we could fulfill the prerequisites, we can start the procedure.
If you are familiar with and using the gcloud commands, as usual, you might succeed in pushing the Docker image to GCR just by executing the following command.
docker push [host name]/[project name]/latest
But if you are not like the above, you will face the following error message with the above command. Because we need to authenticate and login into your GCP project in advance.
unauthorized: You don't have the needed permissions to perform this operation, and you may have invalid credentials. To authenticate your request, follow the steps in: https://cloud.google.com/container-registry/docs/advanced-authentication
So, I would like to introduce how to solve the above error so that we can execute the docker push command successfully next.
Step1: Auth by gcloud auth login
We need to execute the gcloud auth login command to authenticate with the GCP. Once you execute the following command, the web browser will show the “Google Login Page” window by clicking the links in the terminal where you execute the command.
% gcloud auth login
Your browser has been opened to visit:
[The link appears here]
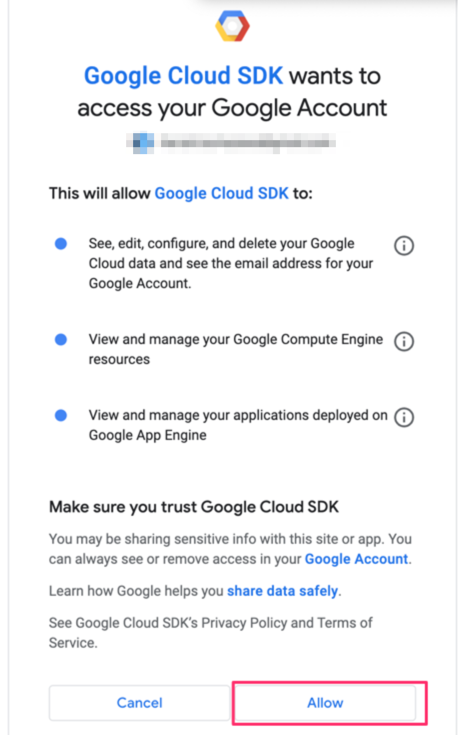
So, you can log in and authenticate the GCP according to this window. If faced the below window, confirm what kind of access will be granted, then click the “Allow” button to proceed.
Once the authenticate process has been completed, the following message will appear in the terminal.
You are now logged in as [your account].
Your current project is [None].  You can change this setting by running:
  $ gcloud config set project PROJECT_ID
With these procedures, the authentication has been completed. Also as the message mentioned, we should set the default GCP project which will access with the gcloud command so that we will not access the unintentional project that we want.
Step2: Set the project by gcloud config set [project]
To set the GCP project, the only thing we need is to execute the gcloud config set command. Note that the your-project have to be replaced with your GCP project ID.
gcloud config set project your-project
Once the command is completed successfully, the following message will show.
Updated property [core/project].
That’s all for the procedure to use the gcloud command as a preparation. In the next section, I would like to introduce
Step3: Create the Service account for the docker push
Since the preparations has done, so I would like to push the Docker image to the Google Container Registry (GCR). To do that, we need to execute the command docker push.
Also, we should use a service account rather than a user account to perform the docker push command according to this document. So I would like to create a service account to push the container image to the GCR respecting the recommendation.
The required role and permission for the service account to push the Docker image
We need to grant the following permission to this service account according to this document. Since. as this document insists, we need the Storage Admin role for the first time push, I would like to grant the Storage Admin role to the service account that we are going to create for concise. Please refer to the highlights below from this document.
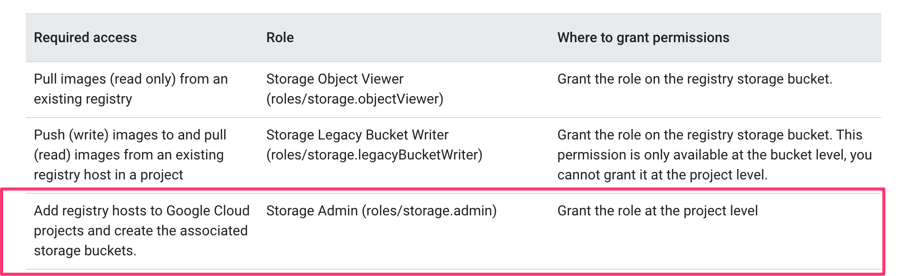


Note that I don’t think this is a best practice, so I recommend blushing up the users and roles later.
The steps to create a required service account
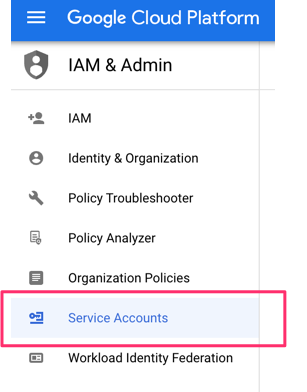
- Open the
GCP console, and go to [IAM and Admin], then click [Service Accounts]
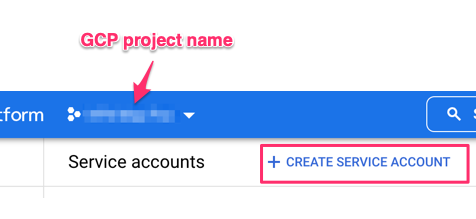
- Click the [CREATE SERVICE ACCOUNT] on the top of the console.
- Fill in the required field, then click [CREATE AND CONTINUE].

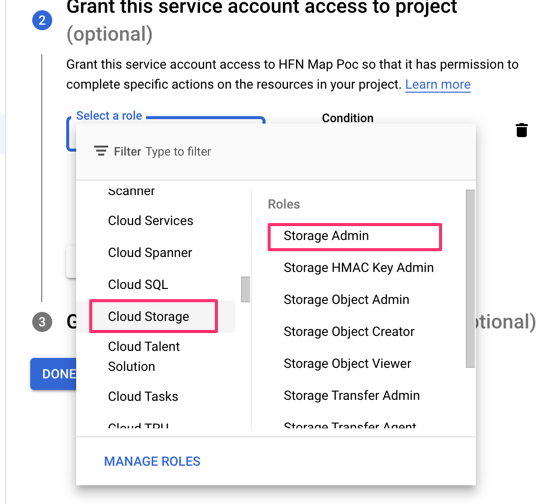
- Select the [Cloud Storage] – [Storage Admin] in the second section, then click [DONE].
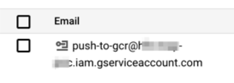
Then you will find the service account has been created and listed.

OK, we got the service account that will execute the docker push command. Next, we need to auth this service account to use the docker push command.
Auth the third party with GCP
Since we are going to use the docker push command in order to push the Docker image into the GCR, we have to follow this instruction of authentication.
There are four methods introduced. Anyway, I would like to go with “gcloud credential helper” according to the recommendation.
How to auth by the service account
- Auth to the GCP
At first, we need to perform gcloud auth login.
gcloud auth login
- Configure the auth by the service account, and generate the key file
Next, execute the following command. Note that [service account name] should be replaced appropriate one. In this article, I have to set the service account previously.
Also, the path in the --key-file can be modified as you like.
gcloud auth activate-service-account [service account name] --key-file="~/key-file.json"
e.g.)
gcloud auth activate-service-account push-to-gcr@my-project.iam.gserviceaccount.com --key-file="~/key-file.json"
- Activate the service account with the key file
At last, we need to execute the following command so that the service account enable to auth with the third party, such as docker.
gcloud auth activate-service-account [service account name] --key-file=[path to keyfile]
Note that the [path to keyfile] have to be set as an absolute path. Unfortunately, the relative path could not work with my personal experience.
Confirmation by gcloud auth list
Once the activation of the service account has succeeded, you can verify if the result by gcloud auth list. You can find the service account listed and activated below.
% gcloud auth list
                  Credentialed Accounts
ACTIVE  ACCOUNT
*       push-to-gcr@my-project.iam.gserviceaccount.com
        personal-account@gmail.com
Configure the Docker
We could auth to use the docker command with GCP in the previous section. The last thing before executing the docker command is to configure the Docker according to this document.
To configure the Docker, we need to execute the following command.
gcloud auth configure-docker HOSTNAME-LIST
This gcloud auth configure-docker command let the docker command access the indicated repository as HOSTNAME-LIST. We can run this command without the HOSTNAME-LIST, but it will show the following WARNING.
WARNING: A long list of credential helpers may cause delays running 'docker build'. We recommend passing the registry name to configure only the registry you are using.
So, we should select the target registry from the following list, then execute like the below.
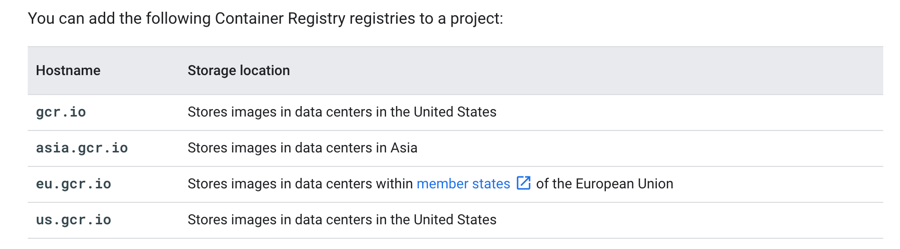
e.g.) In case you are going to use the repository in Asia
gcloud auth configure-docker asia.gcr.io
The result will be like the below.
% gcloud auth configure-docker asia.gcr.io
Adding credentials for: asia.gcr.io
After update, the following will be written to your Docker config file located at
[/Users/harubears/.docker/config.json]:
 {
  "credHelpers": {
    "asia.gcr.io": "gcloud"
  }
}

Do you want to continue (Y/n)?  Y

Docker configuration file updated.
OK, there are a lot of preparation things until here. But finally, it’s completed. We can perform the docker push command which is the primary purpose of this article!
Step4: Push the Docker image to the Google Container Register by docker push
At last, we will achieve to push the Docker image into the Google Container Register after long procedures.
Push the Docker image by docker push
To push the Docker image, we need to execute the following command. Of course, you should replace [gcp project name] with your GCP project name.
docker push asia.gcr.io/[gcp project name]/latest
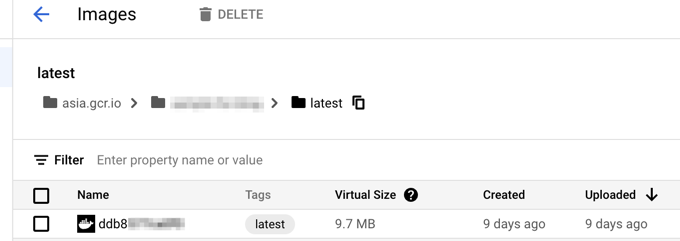
Once the command is finished successfully, you will find the Docker image has been pushed into the Google Cloud Container in the GCP project.

Summary
To push the Docker image into the Google Container Register for the first time, we need to do the followings.
- Auth login into GCP and set the default project
- Create and activate the service account which will be used with the docker push command
- Auth the third party with GCP
- Configure the Docker with gcloud auth configure-docker specifying the target registry
- Perform
docker push
Related Articles

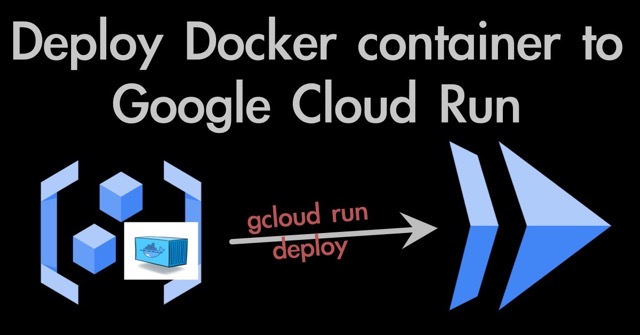
Through the series of several articles, I would like to introduce how to Deploy the Vue3 project to the Google Cloud Run using Docker Container.
The articles would be started with the "Docker Installation". If you've already done the steps included in the specific topic, you can skip each article.